Refoss EM06P PRO Guide: Energy Monitoring and Solar Surplus Control with Home Assistant
Saving money on your electricity bill is not just about turning lights off. It is about understanding what your home consumes and when. In this guide, we take a look at the Refoss EM06P PRO, a 6-channel energy monitor that integrates locally with Home Assistant and can even help manage solar surplus energy.
On YouTube I share more tutorials, hands-on tests and real smart home setups. Subscribe on YouTube

Related video on YouTube
VideoWhat makes the Refoss EM06P PRO special?
Unlike its predecessor, the EM06, the PRO version introduces critical improvements for advanced smart home users:
- Local API and MQTT: Works 100% locally without relying on the cloud.
- Bidirectional energy: Distinguishes between consumed and generated energy, which is essential for solar panel installations.
- Built-in web interface: Direct configuration from your browser.
- Minute-level data: Detailed history for up to 5 years in the cloud, if you choose to use it.
1. Hardware installation
The EM06P PRO includes 6 labeled current clamps, A1, A2, B1, B2, C1 and C2, plus a power cable with three voltage reference wires: red, green and black.
Critical steps:
- Voltage reference: Connect the three colored wires to phase and neutral. If your installation is single-phase, all three can go to the same point so the device can calculate real power in watts. Without this, the readings will be zero.
- Current clamps: Place the clamps around the phase wires of the circuits you want to measure, such as lights, sockets, fridge or other loads.
- DIN rail: The device is designed to fit directly into your electrical panel.
2. Initial setup and Refoss app
Before going to Home Assistant, you need to add the device to your Wi-Fi network:
- Download the Refoss app and add the device. Bluetooth can be used for faster detection.
- Connect it to a 2.4 GHz Wi-Fi network.
- Update the firmware. This is essential to fix reading issues and enable the web interface.
3. Local integration: web interface and static IP
Access the device IP from your browser. From there you can:
- Assign a static IP, which is recommended so Home Assistant does not lose the connection.
- Configure MQTT if you prefer that protocol.
- View real-time consumption with a much more detailed interface than the mobile app.
4. Home Assistant integration through HACS
To unlock its full potential, we will use the custom integration available in HACS.
- In HACS, search for and install
Refoss rpc. - Restart Home Assistant.
- Go to Settings > Devices & Services > Add Integration and search for “Refoss”.
- Enter the IP address of the EM06P PRO.
You will get automatic entities for each channel: power, voltage, current and energy.
5. Automation: using solar surplus energy
If you have solar panels, the EM06P PRO can detect when you are exporting energy back to the grid. We can use that as a trigger to turn on, for example, an electric water heater.
Example YAML automation:
alias: "Solar: Use surplus energy with water heater"
description: "Turns on the water heater when there is more than 800 W of surplus solar energy"
triggers:
  - trigger: numeric_state
    entity_id: sensor.em06p_export_power
    above: 800

conditions:
  - condition: state
    entity_id: switch.electric_water_heater
    state: "off"

actions:
  - action: switch.turn_on
    target:
      entity_id: switch.electric_water_heater

  - action: telegram_bot.send_message
    data:
      chat_id: 123456789
      message: "🚀 Solar surplus detected. Turning on the water heater to save energy."

mode: single
Recommended gear
These are the devices used in this project:
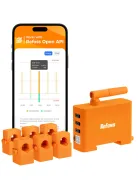
- Refoss EM06P — Reviewed in the video: Official website (coupon: ) · Amazon · AliExpress
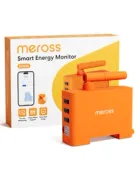
- Meross EM06 — Budget option: Amazon · AliExpress
Conclusion
The Refoss EM06P PRO is the missing piece in many Home Assistant installations if you want a professional Energy Dashboard. It lets you stop guessing and start automating based on real data.
Related video

Recommended gear