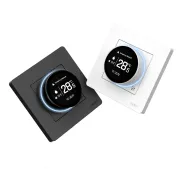
How to Install a Smart Heating Thermostat – Complete Guide with BTicino Smarther XG8002
How to Install a Smart Heating Thermostat – Complete Guide with BTicino Smarther XG8002 In the age of home automation and smart living, smart thermostats have changed the way we manage heating.
On YouTube I share more tutorials, hands-on tests and real smart home setups. Subscribe on YouTube

Related video on YouTube
VideoIn the age of home automation and smart living, smart thermostats have changed the way we manage heating. They not only help save energy, but also make remote control from your phone easier, along with integration with voice assistants like Google Home, Alexa and Home Assistant.
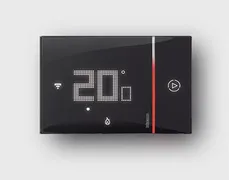
In this guide, I’ll walk you through how to install a smart heating thermostat, specifically the BTicino Smarther XG8002, one of the most advanced models and one that works well with automation systems. I’ll also share my own installation experience at home, the issues I ran into, and how I solved them.
🔥 Why install a smart thermostat?
A smart thermostat is a device that regulates your home’s temperature automatically and remotely, optimizing energy use. Here are a few reasons to install one:
✅ Energy savings: Reduce heating consumption with smart scheduling.
✅ Remote control: Adjust the temperature from your phone with an app.
✅ Automation: Integrates with Google Home, Alexa and Home Assistant.
✅ Personalized comfort: Set different temperatures based on the time of day.
🏆 BTicino Smarther XG8002: Why choose this model?
Among all the smart thermostat options, I chose the BTicino Smarther XG8002 for its compatibility with Home Assistant, something other models don’t offer so easily. It also has a sleek design and can be installed in 80 mm and 120 mm wall boxes, which makes it an excellent choice.
📌 Key features:
✔️ Control from the Home + Control app.
✔️ Compatibility with Google Home, Alexa and Home Assistant.
✔️ Built-in temperature and humidity sensors.
✔️ Easy installation in standard wall boxes.
📌 Check price or buy it::
🔗 Amazon: PRICE
🛠 Before you start: tools and materials you’ll need
Before installing the thermostat, make sure you have:
🔹 BTicino Smarther XG8002 thermostat.
🔹 Phillips and flathead screwdriver.
🔹 Drill (if you need to secure the base to the wall).
🔹 Level (so the thermostat sits straight).
🚀 Step by step: How to install the smart thermostat
1️⃣ Turn off the power and remove the old thermostat
The first thing to do is turn off the power at the main panel to avoid any risk. Then remove the old thermostat, identify the wires, and disconnect them.
📌 My experience: When I removed the previous thermostat, I realized the wall box was wider than usual (120 mm), which influenced my decision to choose the BTicino Smarther XG8002, since it fits that size without any problem.
2️⃣ Identify and connect the wires
Heating thermostats usually have four main wires:
✔️ Live (L, black or brown).
✔️ Neutral (N, blue).
✔️ Two boiler wires (C and NO/NC).
The thermostat acts as a relay that opens or closes the circuit to turn the boiler on or off.
📌 My experience: I connected the wires following the thermostat diagram:
- Live (L) and neutral (N) for power.
- C and NO (Normally Open) to activate the boiler.
If your boiler works the other way around (it requires a permanent contact and turns off when the circuit opens), connect it to NC (Normally Closed) instead of NO.
3️⃣ Secure the thermostat to the wall
Once the wires are connected, screw the thermostat base to the wall.
📌 My experience: Before fixing it in place, I used a level to make sure it was straight. Then I snapped on the thermostat front panel, which fits easily with a clip system.
4️⃣ Turn it on and check the electrical connection
We restore power and check that the thermostat turns on correctly.
📌 My experience: When I turned it on, I saw the thermostat flashing blue, which meant it was ready to pair with the app.
📲 Setting up the BTicino Smarther XG8002 with the Home + Control app
1️⃣ Download the Home + Control app on iOS or Android.
2️⃣ Create an account or sign in.
3️⃣ Select BTicino and press the pairing button on the side of the thermostat.
4️⃣ Connect the thermostat to a 2.4 GHz WiFi network (it does not work with 5 GHz).
5️⃣ Set schedules and temperatures according to your needs.
📌 My experience: When setting up the schedule, I enabled the "boost" feature, which lets you raise the temperature quickly for 30, 60, or 90 minutes.
🏡 Integration with Google Home, Alexa and Home Assistant
Google Home
1️⃣ Open the Google Home app.
2️⃣ Go to Add > Set up device.
3️⃣ Search for Netatmo / BTicino and link the account.
Alexa
1️⃣ Open Alexa > Skills & Games.
2️⃣ Search for Netatmo / BTicino and enable the skill.
3️⃣ Link the account and assign the thermostat to a room.
4️⃣ Change the measurement unit to Celsius (it comes set to Fahrenheit by default).
Home Assistant (cloud-free)
1️⃣ Go to Settings > Devices & Services.
2️⃣ Add a new HomeKit device.
3️⃣ Enter the thermostat’s HomeKit code (it’s on the box or in the manual).
4️⃣ Done — you can now control the thermostat without relying on the cloud.
⚠️ Troubleshooting common issues
❌ The boiler doesn’t respond: Check whether the wires are connected to C and NO/NC depending on the boiler type.
❌ Won’t connect to WiFi: Make sure your network is 2.4 GHz and restart the router.
❌ Wrong temperature: Some thermostats report temperature divided by 5. If that happens, check the Home Assistant settings.
Where to buy
If you are interested in any of the options mentioned, here are the available links:
- BTicino Smarther with Netatmo XG8002 — Reviewed in the video: Amazon
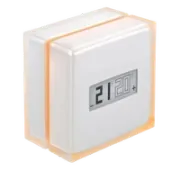
- Netatmo Smart Thermostat NTH01-AMZ — Equivalent alternative (Inalámbrico): Amazon
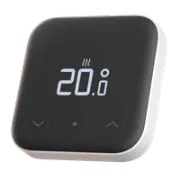
- tado° Smart Thermostat X Starter Kit — Equivalent alternative (Inalámbrico): Amazon
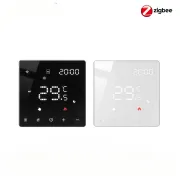
- MOES Zigbee Smart Thermostat for Heating — Budget option (Zigbee): Official store · Aliexpress
- MOES Zigbee Star Ring Smart Thermostat — Equivalent alternative (Zigbee): Official store · Aliexpress
🏆 Conclusion
Installing a smart thermostat like the BTicino Smarther XG8002 is an excellent decision to improve energy efficiency and comfort at home. Its integration with Home Assistant, Google Home and Alexa makes it a versatile and easy-to-use option.
My installation experience was pretty straightforward, and the final result looks amazing. If you’re looking for a thermostat that is easy to install, stylish, and compatible with smart home systems, BTicino Smarther XG8002 is a great choice.
Related video

Reviewed device