CrowPanel ESP32-P4 with Home Assistant: Display, Sensors, Notifications, Dashboard and Voice Assistant
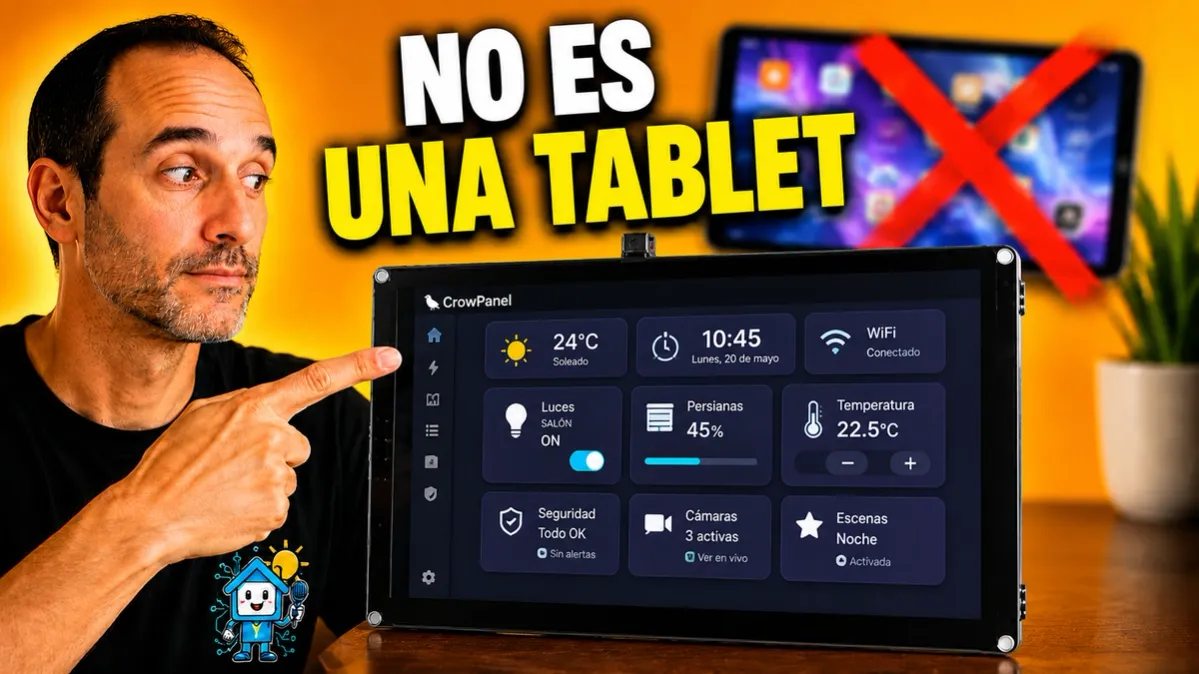
The CrowPanel ESP32-P4 is one of those displays that, at first glance, looks like a small tablet for testing. But it can actually become something much more interesting: a Home Assistant touch panel, a sensor display, a notification system, a smart home dashboard and even a voice interaction point. In this article, I show everything I tested with this display: from the initial hardware connection to ESPHome integration, Home Assistant sensor visualization, an air quality panel, on-screen text notifications, full WallPanel-style dashboards and a final test using the display as a Voice Assistant. The idea is not simply to turn on the screen. The idea is to turn it into a useful device inside a real smart home installation.
On YouTube I share more tutorials, hands-on tests and real smart home setups. Subscribe on YouTube
Related video on YouTube
Video1. What is the CrowPanel ESP32-P4?
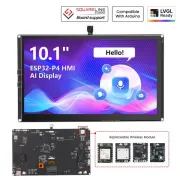
The display I am testing in this project is a CrowPanel based on the ESP32-P4, in a 10.1-inch format (1024x600 px). It is a touch display designed for embedded projects, graphical development, HMI interfaces and advanced ESP32 testing.
The interesting part is that this is not a traditional Android tablet. The CrowPanel does not work like a conventional tablet, but as a firmware-controlled display that we can customize with ESPHome and use inside Home Assistant.
In the video, I start almost from scratch: connecting the Wi-Fi module, the antenna, the speakers and the power supply before integrating the display with Home Assistant.
2. Why this display is interesting for Home Assistant
Many Home Assistant users use an Android tablet as a wall panel. It is a valid solution, but it also has some drawbacks:
- You depend on Android.
- There can be battery issues if it is always plugged in.
- The operating system may close background apps.
- It may consume more power.
- It does not always feel well integrated.
- It is not specifically designed for embedded projects.
The CrowPanel takes a different approach: a dedicated ESP32-P4-based display that we can configure to show specific Home Assistant information, notifications, dashboards and even use as a voice interface.
It is not a solution for every user, but for anyone who enjoys Home Assistant, ESPHome and ESP32, it opens up many possibilities.
3. Initial hardware assembly
The first thing to do is physically prepare the display.
In my case, the initial process includes:
- Connecting the Wi-Fi module.
- Checking the orientation of the module.
- Removing the stickers that cover some holes.
- Connecting the Wi-Fi antenna.
- Installing the speakers.
- Connecting the power cable.
- Turning on the display for the first time.
The display also includes microSD card support, which can be useful in some projects. After powering it on, a basic interface appears with a few test apps, including a small game and a music app that helps confirm that the speakers are working.
4. Installing ESPHome Device Builder
Once the display has been checked and powers on correctly, the next step is to integrate it with Home Assistant using ESPHome.
From Home Assistant, go to:
Settings → Add-ons → ESPHome Device Builder
In the video, I use the stable version of ESPHome Device Builder, not the beta. Once installed, you can enable watchdog monitoring and decide whether to show the sidebar panel. It does not have to stay visible all the time, because ESPHome can be opened directly from its web interface.
Then create a new device from:
ESPHome → New Device
In my case, I used a name like “crowpanel”.
One detail to keep in mind here is that the ESP32-P4 does not always appear directly as a recommended option inside ESPHome, so initially we can choose an approximate configuration and then replace it with the correct YAML.
5. First test firmware on the CrowPanel
For the first test, I use one of the examples available for this display (https://github.com/Elecrow-RD/CrowPanel-Advanced-10.1inch-ESP32-P4-HMI-AI-Display-1024x600-IPS-Touch-Screen/tree/master/example/V1.2/ESPHome). The initial goal is to check that we can compile firmware, upload it to the CrowPanel and see it appear as an online device in ESPHome.
The general process is:
- Download the example files.
- Copy the required PNG icons.
- Open the example YAML.
- Replace the content of the YAML generated by ESPHome.
- Save.
- Compile.
- Download the firmware.
- Manually flash the display using ESPHome Web.
The video also shows a simple error: the device name contained dots, and ESPHome does not allow dots in that name. The solution was to replace them with hyphens.
After compiling, the firmware is downloaded in factory format and installed by connecting the display to the computer via USB. The installation takes a while, especially during memory erase and write operations, so it is normal if it looks like nothing is happening for one or two minutes.
Code used for this example: https://gist.github.com/hectorzin/25483aac4dc888cddab0302b8d19a039#file-test-1-show-connected-sensors
6. Sending Home Assistant sensors to the CrowPanel
Once the first firmware is installed, the display appears online in ESPHome and also as a device inside Home Assistant.
The initial example creates some entities, such as a virtual switch and temperature and humidity sensors. But those sensors do not have real values, because the example assumes that physical sensors are connected directly to the display.
Since I have not connected physical sensors to the CrowPanel, what I do is replace those sensors with real Home Assistant entities. This way, the display shows data that already exists in my smart home setup.
For example:
- Living room temperature.
- Humidity.
- Environmental sensors.
- Any compatible Home Assistant entity.
The idea is to use homeassistant sensors inside the ESPHome YAML and link them to the internal variables shown on the display.
Code used for this example: https://gist.github.com/hectorzin/25483aac4dc888cddab0302b8d19a039#file-test-2-show-home-assistant-sensors
Example structure
sensor:
  - platform: homeassistant
    id: room_temp
    entity_id: sensor.temperatura_salon

  - platform: homeassistant
    id: room_humidity
    entity_id: sensor.humedad_salon
This block is only a reference example. In the final article, you should link the exact YAML used in the video.
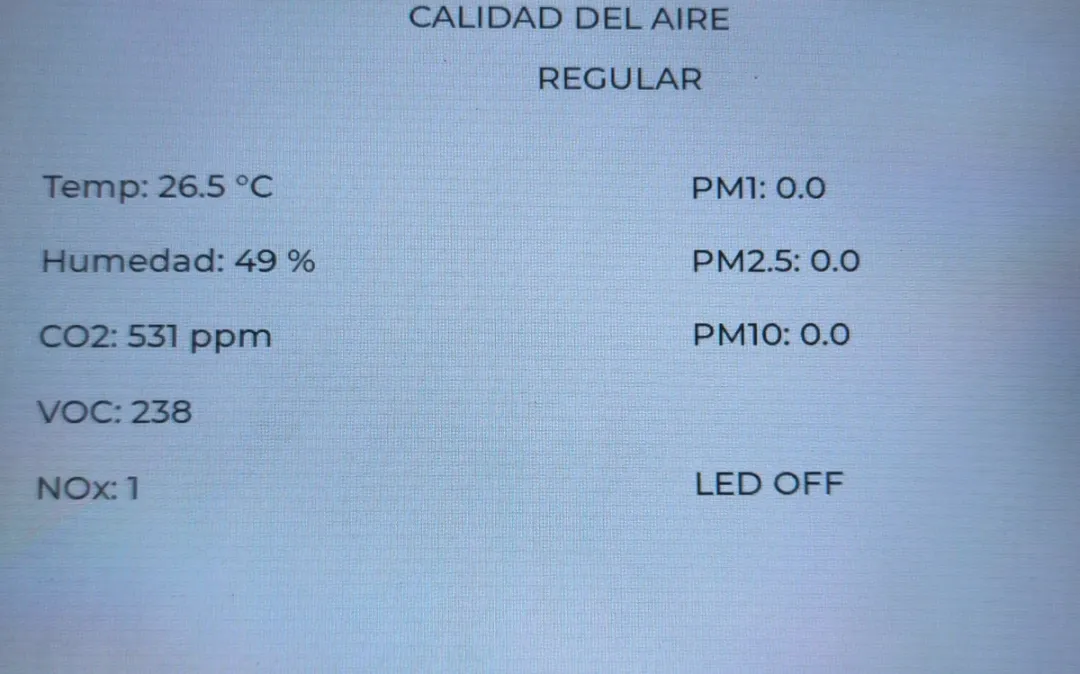
7. Creating an air quality monitor
After showing temperature and humidity, the next step is to create something more useful: a small air quality monitor.
In my case, I start from a panel I already have in Home Assistant and bring that data to the display. To do this, I replace the previous sensors with air-quality-related entities.
For example:
- CO₂.
- PM2.5.
- PM10.
- Temperature.
- Humidity.
- VOC.
- Overall air quality status.
In the video, I explain that basically the previous sensors are replaced by each of the real air quality entities, and the switch we no longer need is removed.
The first result is functional but quite simple: labels with each sensor name and its value.
8. Adding custom icons
Once the sensors appear on the display, the next step is to improve the visual side.
For this, you can use custom PNG icons. In my case, I generated icons for each entity and copied them into the ESPHome folder inside Home Assistant. Then I modified the YAML to indicate which icon should be shown and in which position.
This greatly changes the perception of the project. We go from a functional but fairly technical display to a much more visual panel.
Code used for this example: https://gist.github.com/hectorzin/25483aac4dc888cddab0302b8d19a039#file-test-3-air-quality
Usual path for the icons
/config/esphome/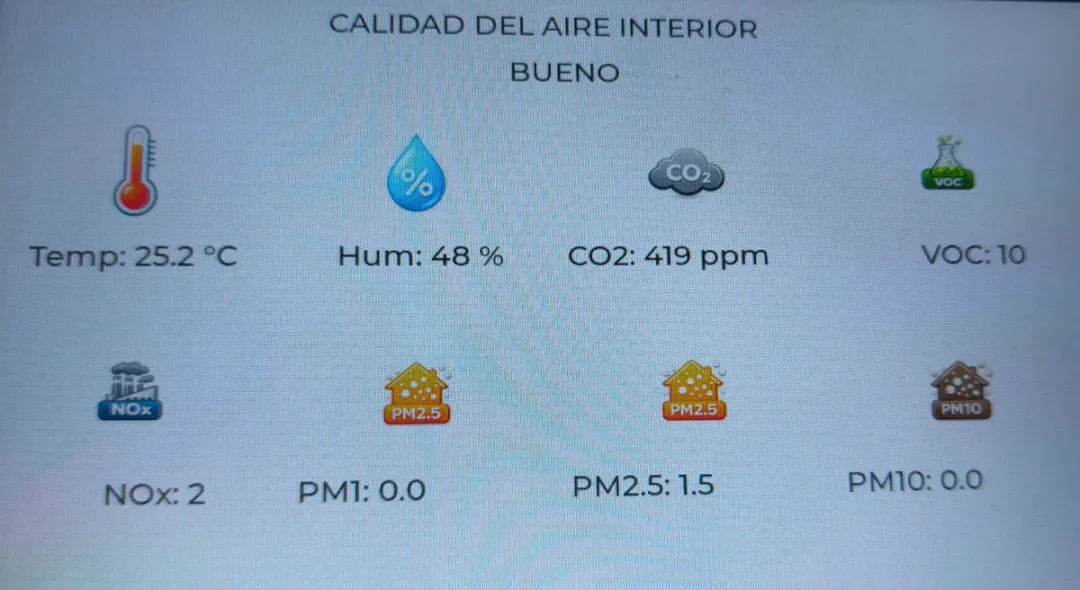
9. Showing notifications on the CrowPanel
Once the display is showing sensors, a very interesting possibility appears: using it to show Home Assistant notifications.
This allows the display to be more than a passive panel: it can also notify us about important events.
Examples of useful notifications:
- Washing machine finished.
- Door open.
- Window open.
- Alarm armed.
- Motion detected.
- High power consumption.
- Poor air quality.
- Important reminder.
In the video, I create a second page on the display to show notification text. The display temporarily switches from the sensor view to an alert view.
10. Scrolling notifications and automatic return
The next step is to improve the notifications so they are more useful.
In the first example, the text appears on screen, but if the message is long it may not display correctly. To solve this, the text can be made to scroll.
The video shows how, when a new message is entered in Home Assistant, it appears on the display with scrolling text and, when it finishes, the screen automatically returns to the sensor view.
I think this is one of the most interesting parts of the project because it turns the CrowPanel into a small notification center for the home.
Code used for this example: https://gist.github.com/hectorzin/25483aac4dc888cddab0302b8d19a039#file-test-4-air-quality-and-notifications

Real-world usage ideas
You can use this system for alerts such as:
- The garage door has been open for 10 minutes
- Air quality has worsened, open a window
- The washing machine has finished
- There is motion at the entrance
- The alarm is armed
11. Turning the CrowPanel into a full Home Assistant dashboard
Up to this point, we have used the CrowPanel to show screens designed directly in ESPHome.
But there is another more powerful possibility: showing full Home Assistant dashboards.
In the video, I go one step further and use a WallPanel-style system so the CrowPanel can display Home Assistant dashboards. This requires adding a repository, installing an app or add-on, downloading specific components and copying files into the ESPHome folder.
The general process is:
- Add the corresponding repository in Home Assistant: https://github.com/fintros/RemoteWebViewServer/tree/main
- Install the application
- Download the code from https://github.com/fintros/ESPHome-CrowPanel-ESP32-P4
- Extract the folder
components and the fileCrowPanelAdv10.yaml - Adjust Wi-Fi credentials.
- Adjust the Home Assistant URL.
- Adapt the firmware to our specific model.
Corrected final code used for this example: https://gist.github.com/hectorzin/25483aac4dc888cddab0302b8d19a039#file-wallpanel
Corrected Home Assistant add-on:
https://gist.github.com/hectorzin/25483aac4dc888cddab0302b8d19a039#file-config-yaml
https://gist.github.com/hectorzin/25483aac4dc888cddab0302b8d19a039#file-dockerfile
https://gist.github.com/hectorzin/25483aac4dc888cddab0302b8d19a039#file-run-sh
12. Important WallPanel firmware settings
The example firmware does not always fit our specific display perfectly.
In my case, I had to adjust several things:
- Wi-Fi credentials.
- Home Assistant URL.
- OTA keys.
- API encryption key.
- ESP32 configuration.
- Touchscreen configuration.
- Touchscreen section.
- I2C bus frequency.
- Specific hardware parameters.
One of the issues that appears is that, if the display had already been flashed with another firmware, the new configuration must keep the keys needed to flash the device again over OTA. That is why I copy the OTA password and API encryption key from the previous YAML to the new one.
Important note
If this is the first time you upload this firmware, you may not need to copy previous keys. If you have already flashed another firmware before, check the OTA password and the API encryption key.
13. Solving common errors
Several errors appear during setup, and they are worth documenting because other users will probably run into them too.
Memory error during compilation
In the video, an error appears when saving or compiling that seems related to a lack of memory. The solution I apply is to restart the entire machine and try again.
Solution:
Restart Home Assistant or the machine where ESPHome is running and compile again.
Error caused by different keys
If the device already had previous firmware with specific keys, it may reject the new firmware if we do not use the same OTA/API keys.
Solution:
Copy the OTA password and the API encryption key from the previous YAML to the new one.
Port already in use error
In my case, there is a problem with port 8081 because it was already in use. The solution was to change it to 8082, restart the application and also modify the ESPHome YAML so the device points to the same port.
Original port: 8081
Alternative port used: 8082
14. Accessing the Home Assistant dashboard
Another important point is dashboard access.
When the CrowPanel tries to load Home Assistant, it may run into the login screen. The problem is that we do not have a comfortable on-screen keyboard to enter username and password.
In the video, the solution is to enable the corresponding exposed proxy option, restart the server and use Chrome with remote inspection tools to complete the login once.
The summarized process is:
- Enable the exposed proxy.
- Restart the server.
- Open Chrome.
- Go to
chrome://inspect. - Configure the Home Assistant IP with the corresponding port.
- Open the remote inspector.
- Manually enter the Home Assistant URL.
- Log in.
- Restart the integration.
- Check that the CrowPanel now loads the dashboard.
After this, full Home Assistant screens can be navigated from the CrowPanel.
15. How this dashboard system really works
An important point: the CrowPanel is not running a full web browser the way an Android tablet would.
What happens is that the server generates or sends dashboard images to the panel. The display allows interaction, but it does not work exactly like a tablet running Chrome or Fully Kiosk.
This has advantages and limitations.
Advantages
- We do not depend on Android.
- The device is much more controlled.
- It is a more embedded solution.
- It can be very useful for simple dashboards.
- It fits well with ESPHome projects.
Limitations
- It is not a full tablet.
- There may be a little more latency.
- Not all complex dashboards will be equally comfortable.
- The size and layout of the cards need to be adjusted carefully.
- It may require more initial work.
16. Using the CrowPanel as a media player
One of the most interesting tests is that the display also appears as a compatible media player.
In the video, I test text-to-speech so the CrowPanel plays an audio message.
This opens up interesting possibilities:
- Spoken alerts.
- Status messages.
- Reminders.
- Security alerts.
- Automation confirmations.
Conceptual example
service: tts.speak
target:
  entity_id: media_player.crowpanel
data:
  message: "The garage door is open"
17. Using the CrowPanel as a voice assistant
The most striking part of the project is using the CrowPanel as a voice assistant for Home Assistant.
In the demo, I say:
Okay Nabu, turn on the sofa light
and the light turns on. Then I test the opposite:
Okay Nabu, turn off the sofa light
and the light turns off.
Here it is important to be honest: in my test, it takes longer than I would like. I probably need to better adjust the microphone sensitivity or reduce background noise so detection is faster and more reliable.
But the interesting part is that the integration works. The CrowPanel stops being just a display and also becomes an interaction point with Home Assistant.
Practical recommendation
For this feature to work better, it is worth reviewing:
- Microphone gain.
- Ambient noise.
- Display position.
- Distance from which we speak.
- Activation sensitivity.
- Home Assistant response time.
- Performance of the server that processes the voice.
18. 3D frames to improve the final look
One drawback of this type of display is that it looks like a development board. It works very well for testing, but if we want to place it on a wall, in a kitchen or near an entrance, we will probably want something cleaner.
That is why one interesting option is to 3D print a frame.
With a good frame, the display can go from looking like a lab prototype to looking like a much more integrated smart home panel.
Recommended links
https://www.printables.com/model/1159516-enclosure-for-elecrow-crowpanel-esp32-hmi-50-inch
https://cults3d.com/en/3d-model/gadget/crowpanel-7-desktop-display
Idea for future projects
This topic could easily become another article or video:
How to turn a CrowPanel ESP32-P4 into a professional wall panel for Home Assistant
19. Price and smaller models
One of the strong points of these displays is the price.
The 10.1-inch model is already interesting because of its size and the possibilities it offers, but if we move down to smaller models, prices can become very attractive.
This makes it possible to think about several uses:
- A small display for the entrance.
- Another one for the kitchen.
- One for the office.
- One for the bedroom.
- One dedicated only to air quality.
- Another dedicated to alarms or notifications.
They do not all have to be large. In fact, for many uses a smaller display may be enough and much easier to integrate.
20. Advantages of using a CrowPanel with Home Assistant
After testing it, these are the clearest advantages I see:
ESPHome integration
It allows you to create highly customized projects connected directly to Home Assistant.
Dedicated display
We do not depend on an Android tablet or its limitations.
Ability to display sensors
We can display real Home Assistant data.
Notifications
The display can notify us about important events.
Full dashboard
With the right firmware, it can show full Home Assistant dashboards.
Voice Assistant
It can work as an entry point for voice commands.
Price
Especially in smaller models, it can be a very interesting alternative.
21. Limitations you should keep in mind
Not everything is perfect.
These are the most important limitations:
- The initial setup takes time.
- It is not as plug and play as a tablet.
- There may be compilation or dependency errors.
- The firmware must be adapted to the specific model.
- The dashboard does not work exactly the same as in a full browser.
- The voice assistant may require microphone adjustment.
- The physical appearance needs a frame or enclosure to look professional.
22. Is it worth it?
For a user who just wants to mount a screen on the wall without complications, an Android tablet is probably still easier.
But for anyone who uses Home Assistant, ESPHome and enjoys creating custom solutions, the CrowPanel ESP32-P4 seems like a very interesting option.
It is not simply a display. It can be:
- Sensor panel.
- Touch dashboard.
- Notification center.
- Media player.
- Voice assistant.
- Physical interface for Home Assistant.
And that makes it a very powerful alternative for advanced smart home projects.
Recommended gear
Device used in this project: Elecrow CrowPanel Advanced 10.1 inch ESP32-P4 HMI AI Display. If you need it, here is where to find it:
- Elecrow CrowPanel Advanced 10.1 inch ESP32-P4 HMI AI Display — Reviewed in the video: Official website
23. Conclusion
The CrowPanel ESP32-P4 surprised me because it is not just another touch display. With ESPHome and Home Assistant, we can take it much further: sensors, notifications, full dashboards, audio playback and voice control.
It is not the simplest option for everyone, but it is one of the most interesting if you like creating your own smart home devices.
The best part is that you are not simply buying a display: you are buying a base for many different projects.
And in the Home Assistant world, that is exactly where the fun begins.